I recently had the chance to set up a few security automation bits and pieces, and figured I’d go ahead and detail some of my thoughts on a few quick wins. We’ll look at assigning code owners for security sensitive source code, extending linters to keep bugs from re-appearing in the future and automating alerting on third party library vulnerabilities. These techniques give a low-false-positive rate, and provide a simpler way to get started with security automation rather than attempting to cobble together full-fat static and dynamic security analysis right off the bat.
While static code analyzers and automated dynamic analysis certainly has its place in a mature development pipeline, both of these usually involve many false positives. By initially focusing on techniques that have a lower probability for causing false positives, you can begin to build out robust security automation and create a culture focused on secure development without placing a huge initial load on your developers. Don’t get me wrong, robust static and dynamic analysis as part of your CI/CD pipeline is a good idea, but learning to crawl before learning to sprint is usually a better idea.
CODEOWNERS and merge reviews
We’ll start with the trick that requires the smallest amount of technical voodoo. This specific technique stems from a real world scenario we faced. A client had moved to an agile development cycle, and made the decision that security review would be performed when changes touch security sensitive code. When we came through to perform the annual penetration test, we discovered a fairly critical OAUTH vulnerability. Ruh-roh! What had happened here is that a change was made, however it wasn’t deemed security impacting so it never underwent further review. End result was a vulnerability that made it into production.
In a basic git-based code repository, the idea is that developers have branches that are used to, well, develop stuff. Once that feature/fix/whatever is ready, a pull request is sent to merge that code into the master branch. A subset of users with merge permissions review the request and then (eventually) accept the change. This core principle can be extended further, assigning additional review requirements for sensitive parts of the code base. Enter the CODEOWNERS file. By using the CODEOWNERS file, you can specify which files need to be reviewed by whom. Applying this concept for the betterment of the application’s security is reasonably straight forward. Find security sensitive code chunks, such as authentication logic and input validators, and mark them as requiring further review by a security champion.
Quick tangent. When I say “security champion” I mean an individual within each squad that will be wearing the security-hat, so to speak. This doesn’t need to be a well seasoned senior security consultant lunatic (that being said, we do offer Security-Consultant-Lunatic-as-a-Service here at Pulse Security, so email [email protected] if that’s what you really need). Instead, your security champion can simply be a senior-ish team member with an interest in secure development.
As security becomes more integrated with the development life cycle and the team faces their unique challenges, this person will become the go-to for security questions and grow their understanding of secure development techniques. Just hired Pulse Security to do a source review of your project? Keep the security champion across the review and include them in the report debrief. The idea is not to replace specialized consultants with this individual, but instead have the champion remain across the application’s ongoing security work and become the point of contact for the rest of the squad.
OK back to codeowners files. The file is usually placed in the root of the repository, and has lines that look something like this:
/src/auth.py @User1 @User2 @User3
if /src/auth.py is modified, then approval requests are automatically fired to User1, User2 and User3.
The user’s specified in the file are automatically requested to approve the change, and auth.py receives additional attention when changes are made. The down-side here is that any change to this file will require additional review, e.g. fixing a spelling mistake in a comment. On the other hand, if the change is fixing a spelling mistake, then it shouldn’t take the security champion very long to review the request! The idea is to find a balance point where security sensitive code is adequately scrutinized, but security review does not become a constant bottleneck.
The codeowners file can be used to specify entire directories and wild cards as well, so if you have a collection of sensitive files or want to use far broader strokes (say, everything under /src/lib/auth_framework needs to be reviewed by the security champion) then that’s possible too.
Unfortunately, merge-request approvals are only available on Gitlab’s paid enterprise edition, Do’h! If you’re using Github or the paid Gitlab version, then you’re good to go! The core principle of enforcing file and directory-level approvals should be able to be ported to most platforms, however. Bitbucket has a few options in the marketplace, as well as the ability to develop custom merge request check plugins.
Linters and Custom Checks
“Lint, or a linter, is a tool that analyzes source code to flag programming errors, bugs, stylistic errors, and suspicious constructs.” - wikipedia
In the most basic sense, a linter is usually an abstract syntax tree (AST) parser that complains about messy code. You’re probably already using a linter to keep your code base all neat and tidy, so let’s look at extending a linter to keep bugs squished.
By writing your own linter checks, you can not only resolve bugs, but burn the bugs down and salt the earth where they once stood. Forever. After a vulnerability is discovered, turning it into a custom check means that you can build out an automated security scanning step with high confidence that’s tailored for your specific code base. Say a pentest reveals some nasty bug, take that finding and turn it into a linter check to make sure it’s found across the entirety of the code base. If there is additional code that wasn’t hit during the testing, then it’ll cover those off too.
Vue.js - Finding XSS in marked() and extending ESLint
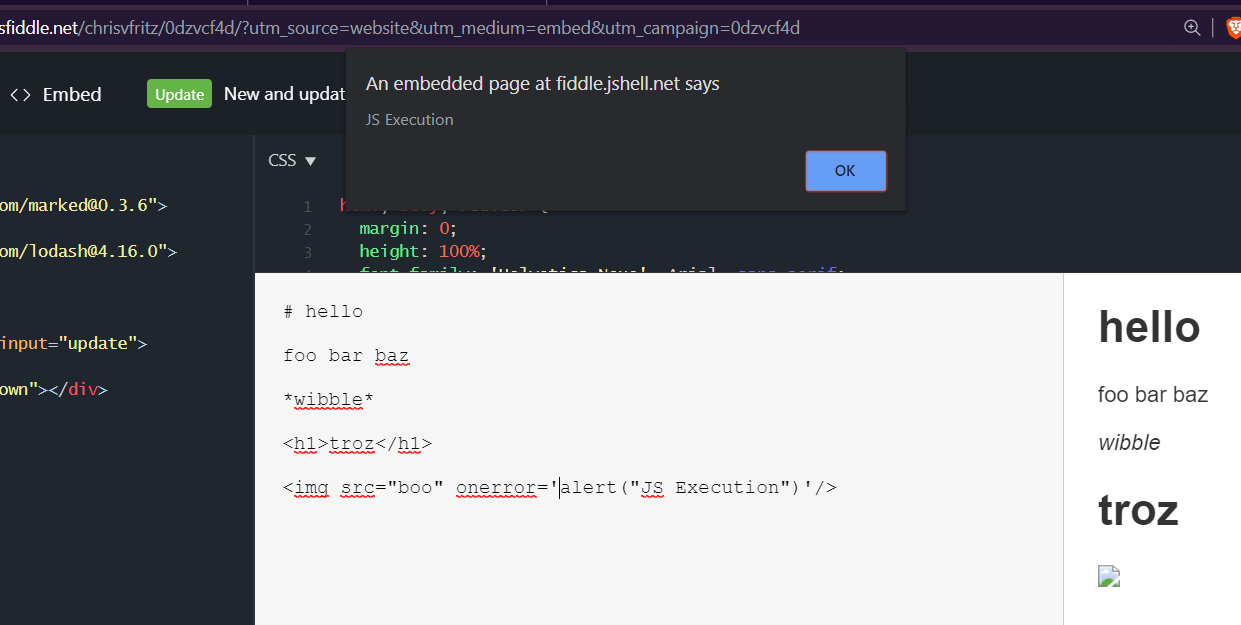
Recently I worked on a Vue.JS project that used markedjs to render user-entered markdown to HTML. By default, MarkedJs allows users to insert HTML code, leading to cross site scripting (XSS). Let’s look at writing a linter check to catch that.
The Bug
The issue was a fairly straight forward cross site scripting bug. I’ve replicated the vulnerable code to show the basic idea:
He’s an approximation of the vulnerable code:
<template>
  <div>
    <b-container fluid>
    <b-row>
      <b-col sm=6>
        <div id="editor"><textarea v-model="model" v-on:input="update"/></div>
      </b-col>
      <b-col sm=6>
        <div class="well" v-html='preview'></div>
      </b-col>
    </b-row>
    </b-container>
  </div>
</template>

<script>
let marked = require('marked')

export default {
...SNIP...
  computed: {
    preview () {
      if (this.model) {
        return marked(this.model)
      }
      return ''
    }
  }
}
</script>
The problem here is return marked(this.model). this.model is user controllable and can be persisted in the application state (pen-tester speak for “was stored in the CouchDB that backed this app”). As a result, we end up with a stored cross site scripting vulnerability. An attacker can generate a malicious page, and whenever a legit user browses to that page the attacker’s JavaScript payload is executed. XSS 101.
The fix for this problem is to kick in the MarkedJs input sanitizer, like so:
if (this.model) {
    return marked(this.model, { sanitize: true })
}
Writing the check
The project already used ESLint, so writing an additional check made sense. You can use generator-eslint to get started. Tutorials on developing custom plugins and rules are already available, so I’ll gloss over the set up process. Eventually, you end up with a blank rule file that will contain your shiny new check:
"use strict";

//------------------------------------------------------------------------------
// Rule Definition
//------------------------------------------------------------------------------

module.exports = {
    meta: {
        docs: {
            description: "Detects marked() used without the sanitize flag",
            category: "Fill me in",
            recommended: false
        },
        fixable: null,  // or "code" or "whitespace"
        schema: [
            // fill in your schema
        ]
    },

    create: function(context) {

        // variables should be defined here

        //----------------------------------------------------------------------
        // Helpers
        //----------------------------------------------------------------------

        // any helper functions should go here or else delete this section

        //----------------------------------------------------------------------
        // Public
        //----------------------------------------------------------------------

        return {

            // give me methods

        };
    }
};
The next step is to figure out how to parse the JavaScript AST and detect when marked() is called without the sanitize flag. This is where things can get complicated very quickly. If you’re familiar with MarkedJS, then you probably already know that there are several ways to set up flags and call marked()! In this case, we’re going to make the decision that (in this code base), we’ll specify the sanitizer directly in the marked() function call. This takes away some flexibility in how the project can call marked, but simplifies the linter.
You can use astexplorer to make figuring out the AST easier. In this case, I entered marked(input, { sanitize: true }) and got the following JSON for the AST:
  "body": [
    {
      "type": "ExpressionStatement",
      "start": 0,
      "end": 33,
      "expression": {
        "type": "CallExpression",
        "start": 0,
        "end": 33,
        "callee": {
          "type": "Identifier",
          "start": 0,
          "end": 6,
          "name": "marked"
        },
        "arguments": [
          {
            "type": "Identifier",
            "start": 7,
            "end": 12,
            "name": "input"
          },
          {
            "type": "ObjectExpression",
            "start": 14,
            "end": 32,
            "properties": [
              {
                "type": "Property",
                "start": 16,
                "end": 30,
                "method": false,
                "shorthand": false,
                "computed": false,
                "key": {
                  "type": "Identifier",
                  "start": 16,
                  "end": 24,
                  "name": "sanitize"
                },
                "value": {
                  "type": "Literal",
                  "start": 26,
                  "end": 30,
                  "value": true,
                  "raw": "true"
                },
                "kind": "init"
              }
            ]
          }
        ]
      }
    }
  ]
So for each CallExpression with the name marked, we want to error if there is no arguments array entry that corresponds to our { sanitize: true } statement. Easy, the check ends up as:
 create: function (context) {
    return {
      'CallExpression': function (node) {
        if (node.callee.name === 'marked') {
          var sanitizeflag = false
          if (node.arguments.length > 1) {
            node.arguments.forEach(function (arg) {
              if (arg.type === 'ObjectExpression') {
                arg.properties.forEach(function (prop) {
                  if (prop.key.name === 'sanitize' && prop.value.value === true) {
                    sanitizeflag = true
                  }
                })
              }
            })
          }

          if (sanitizeflag === false) {
            context.report(node, 'marked used without "sanitize = true" - XSS sink')
          }
        }
      }
    }
  }
After adding the rule to packages.json and .eslintrc.js, running eslint --ext .js,.vue src/ errors on the vulnerable code pattern. Awesome!
doi@ubuntu:~/src$ npx eslint --ext .js,.vue src/

/home/doi/src/components/Editor.vue
  41:16  error  marked used without "sanitize = true" - XSS sink  marked/marked-no-sanitize

/home/doi/src/components/View.vue
  72:16  error  marked used without "sanitize = true" - XSS sink  marked/marked-no-sanitize

✖ 2 problems (2 errors, 0 warnings)
The linter step was already included in the CI/CD pipeline for the project. By adding in this check, if marked() is run without the sanitize flag in the future, the build will fail and the bug will be caught early. Finishing off the rule would mean writing up the documentation and tests, as well as implementing the auto-fix logic.
Automated Package Scanning
The last bit we’re going to look at is automated package scanning for the same code base as above. Third party libraries have vulnerabilities, as these get found out and patched its important to make sure you’re using the latest secure versions available. By having your build pipeline complain when a package with a known vulnerability is used, you can get alerted to these issues quickly and minimize the amount of time known-vulnerable libraries are used by your code base.
Nodejs and NPM audit
Node includes npm audit, which looks for packages with known vulnerabilities. Here’s what it looks on a project created using vue-cli (also, funnily enough, the reason I don’t use vue-cli any more…)
doi@ubuntu:~/src/testapp$ npm audit

                       === npm audit security report ===

# Run  npm install --save-dev [email protected]  to resolve 65 vulnerabilities
...SNIP...

found 84 vulnerabilities (65 low, 8 moderate, 10 high, 1 critical) in 31705 scanned packages
  run `npm audit fix` to fix 6 of them.
  78 vulnerabilities require semver-major dependency updates.
Simply adding npm audit as a step in the CI/CD pipeline is all it takes. Easy! As new published vulnerabilities are announced, the audit step in the pipeline will fail and let you know that packages need to be upgraded.
Wrap up
We’ve covered some simple techniques to start thinking about security automation in an application development. There is a whole lot more out there in terms of automated security analysis, but fundamentally it’s going to come down to enabling your developers to write secure code and having more bugs fixed earlier in the project.